|
Here we examine a sample image by the PIXY system actually.
Please download the sample image (sample.fts) below at first.
http://www.aerith.net/misao/pixy/sample.fts
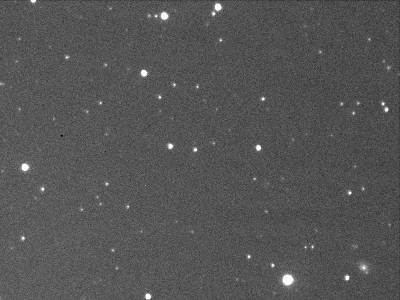
Sample Image
This image is taken with a camera lens.
It shows about 1x1 deg or smaller area around part of Ursa Major, R.A.=11h48m, Decl.=+48o.
Now let's start the examination by the PIXY system.
First of all, open the DOS prompt on Windows95 (xterm or so, in case of UNIX system).
Type as follows in DOS prompt and run the PIXY system.
|
java misao.pixy.Pixy -console
|
If the PIXY system cannot run, please read Install again and check if the JDK is installed properly, the CLASSPATH is set properly, etc.
If JRE(Java Runtime Environment) is installed, the directory where the package is unpacked must be set by an option -cp.
Then, type as follows in DOS prompt and run the PIXY system (the example is in case the package is unpacked at C:\).
|
java -cp C:\ misao.pixy.Pixy -console
|
Parameters can be set in Q&A style when using -console option.
For details of options of the PIXY system, please read Running PIXY.
Well, let's set parameters while answering the questions.
Here the questions output by the system are expressed in italic with underline, and the letters we should input are expressed in bold.
- URL or filename of image: sample.fts
-
Input the filename of the image.
Here input as sample.fts.
- Exposure start date and time in UT: 1998 Mar 7 16:22:27
-
Input the date and time when exposure started.
Actually, this data is not used in the examination by the PIXY system.
So you can hit RETURN key immediately here.
However, the date and time input here is recorded into PXF file and used when registering into magnitude database.
So it is recommended to input the correct date and time.
- Exposure in seconds: 20
-
Input the exposure time in second.
This data is not used in the examination by the PIXY system, too.
So you can hit RETURN key immediately here.
- Input code: cdrom.gsc11
-
Then the list of star catalogs which can be used for examination is printed and the system urges to input a code.
The Guide Star Catalog 1.1 is proper usually, and the USNO-A1.0 is required only when examining the image taken with a large telescope.
Here let's choose the Guide Star Catalog 1.1 and input the code cdrom.gsc11.
Of course, we have to have the CD-ROM set of the Guide Star Catalog 1.1.
- Root directories of the catalog: E:\
-
Input the CD-ROM drive.
Here is the example that CD-ROM drive is E:.
- Approximate position (J2000.0): 11 48 0 +48 0 0
-
Input the approximate R.A. and Decl. of the image.
As the sample image is around R.A.=11h48m, Decl.=+48o, so input this position here.
- Position error in degree: 0
-
Input the expected error of the R.A. and Decl. input above.
It can be 0 in most case.
- Approximate horizontal field of view in degree: 1
-
Input the approximate field of view.
As the sample image shows about 1x1 deg area, input 1 here.
- Limiting magnitude to be detected at least:
-
Input the limiting magnitude to be detected at least.
When you would like to let the PIXY system automatically set the limiting magnitude, hit RETURN key immediately here, with no input.
Here let's hit RETURN key with no input.
- Magnitude code:
-
Hit RETURN key immediately here, with no input.
- Mirror image? [y/N]:
-
The sample image is not a mirror image, so hit RETURN key immediately here, with no input.
- SBIG ratio (ST-4/6)? [y/N]:
-
The sample image is that of ST-4/6, so hit RETURN key immediately here, with no input.
- Reject cosmic ray? [y/N]: Y
-
Let's remove the cosmic rays and white noises automatically.
So input Y here.
- Print star data in detail (much memory are required)? [y/N]:
-
Hit RETURN key immediately here, with no input.
- Filename to save midway progress (.log):
-
Hit RETURN key immediately here, with no input.
- Filename to save results (.pxf): sample.pxf
-
Input a name of a PXF file to save the results.
Here input as sample.pxf.
Now all configurations are finished.
For details of these parameters, please read Input Parameters.
After configurations, the PIXY system begins to examine the image.
It will take about one minute or some more.
While examining, the midway progress is printed to the display.
When the examination is failed with the input parameters, PIXY system retries to examine by changing the approximate R.A. and Decl. of the image, at most 9 times.
After finishing the examination, the following four windows open.
- Control Panel (Control)
- Image (Image)
- Chart of Detected Stars (Detected Stars)
- Chart of Catalog Data (Catalog Data)
Chart of Detected Stars (Detected Stars)

Chart of Catalog Data (Catalog Data)
Clicking a star on the charts by mouse, a dialog opens and shows measured data or recorded data in star catalog.
In the two charts above, stars are painted in some colors.
A green star means it was detected as recorded in star catalog.
The position and magnitude is very similar to the value in the catalog.
Therefore, they can be ignored when searching a new object.
Remarkable objects are painted in red, yellow or blue.
Stars only exist in one chart of the two are painted red.
A red star in the chart of detected stars means a candidate of a new object, because it is not recorded in star catalog.
A red star in the chart of catalog data means a candidate of a catalog error, because a star in catalog is not found in the image.
A yellow star means the magnitude in the image estimated by the PIXY system differs evidently from that recorded in star catalog.
So it may be a variable star.
A blue star means the position in the image measured by the PIXY system differs a bit from that recorded in star catalog.
It implies the star has moved by proper motion.
But in many cases, the star is nebula or a pair of close double stars, and the position is just inaccurate.
If both the measured position and magnitude differ from those in star catalog, the star is painted yellow.
In case of this sample image, there is a faint star just below to the right of a galaxy below to the right of the image.
The star is painted red in the chart, so we can see this star is not recorded in the Guide Star Catalog 1.1.
So this may be a supernova (*1).
*1 Further investigations reveal that this is a normal star, just not recorded in the Guide Star Catalog 1.1.
On the other hand, there are some bright red stars on the chart of catalog data.
No counterpart stars are found on the image.
Therefore, these data should be catalog errors which do not exist in fact.
There are five yellow stars.
One, at the edge of upper left, shows that the magnitude could not estimated properly because it is at edge.
Two yellow stars near the right edge are blurred in the sample image, so they are galaxies.
The other two may be variable stars.
In addition, the position of the yellow star near the center of the image seems different from that in the catalog.
It may be moving by proper motion.
There are two blue stars.
One, at the left edge, shows that the position could not estimated properly because it is at edge.
Another one below in the right is blurred in the sample image, so it is a galaxy.
All measured data of detected stars and data in star catalog are recorded in PXF file.
In addition, information of the image in detail, accurate R.A. and Decl. of the center, accurate field of view, limiting magnitude, etc., are also recorded in the PXF file.
The PXF file of this sample image is:
sample.pxf
Please read PXF File Format for how to read the PXF file.
|
